
Welcome to Ruleshammer! This week is the 8th “episode” of a series I’m calling Ruleshammer Battle. A step by step explanation of a small game of warhammer 40k. Remember the banner below will take you to the Ruleshammer 9th Edition Compendium, for all the questions I’ve answered for the last few months!

Welcome back! If you missed Episode (7), I’d recommend having a read of that first to get caught up! Last episode we went through Death Guard charges and fighting, this time I’m going to look at how decisions made by both players could have drastically changed the course of that turn.
Priorities when Removing Causalities
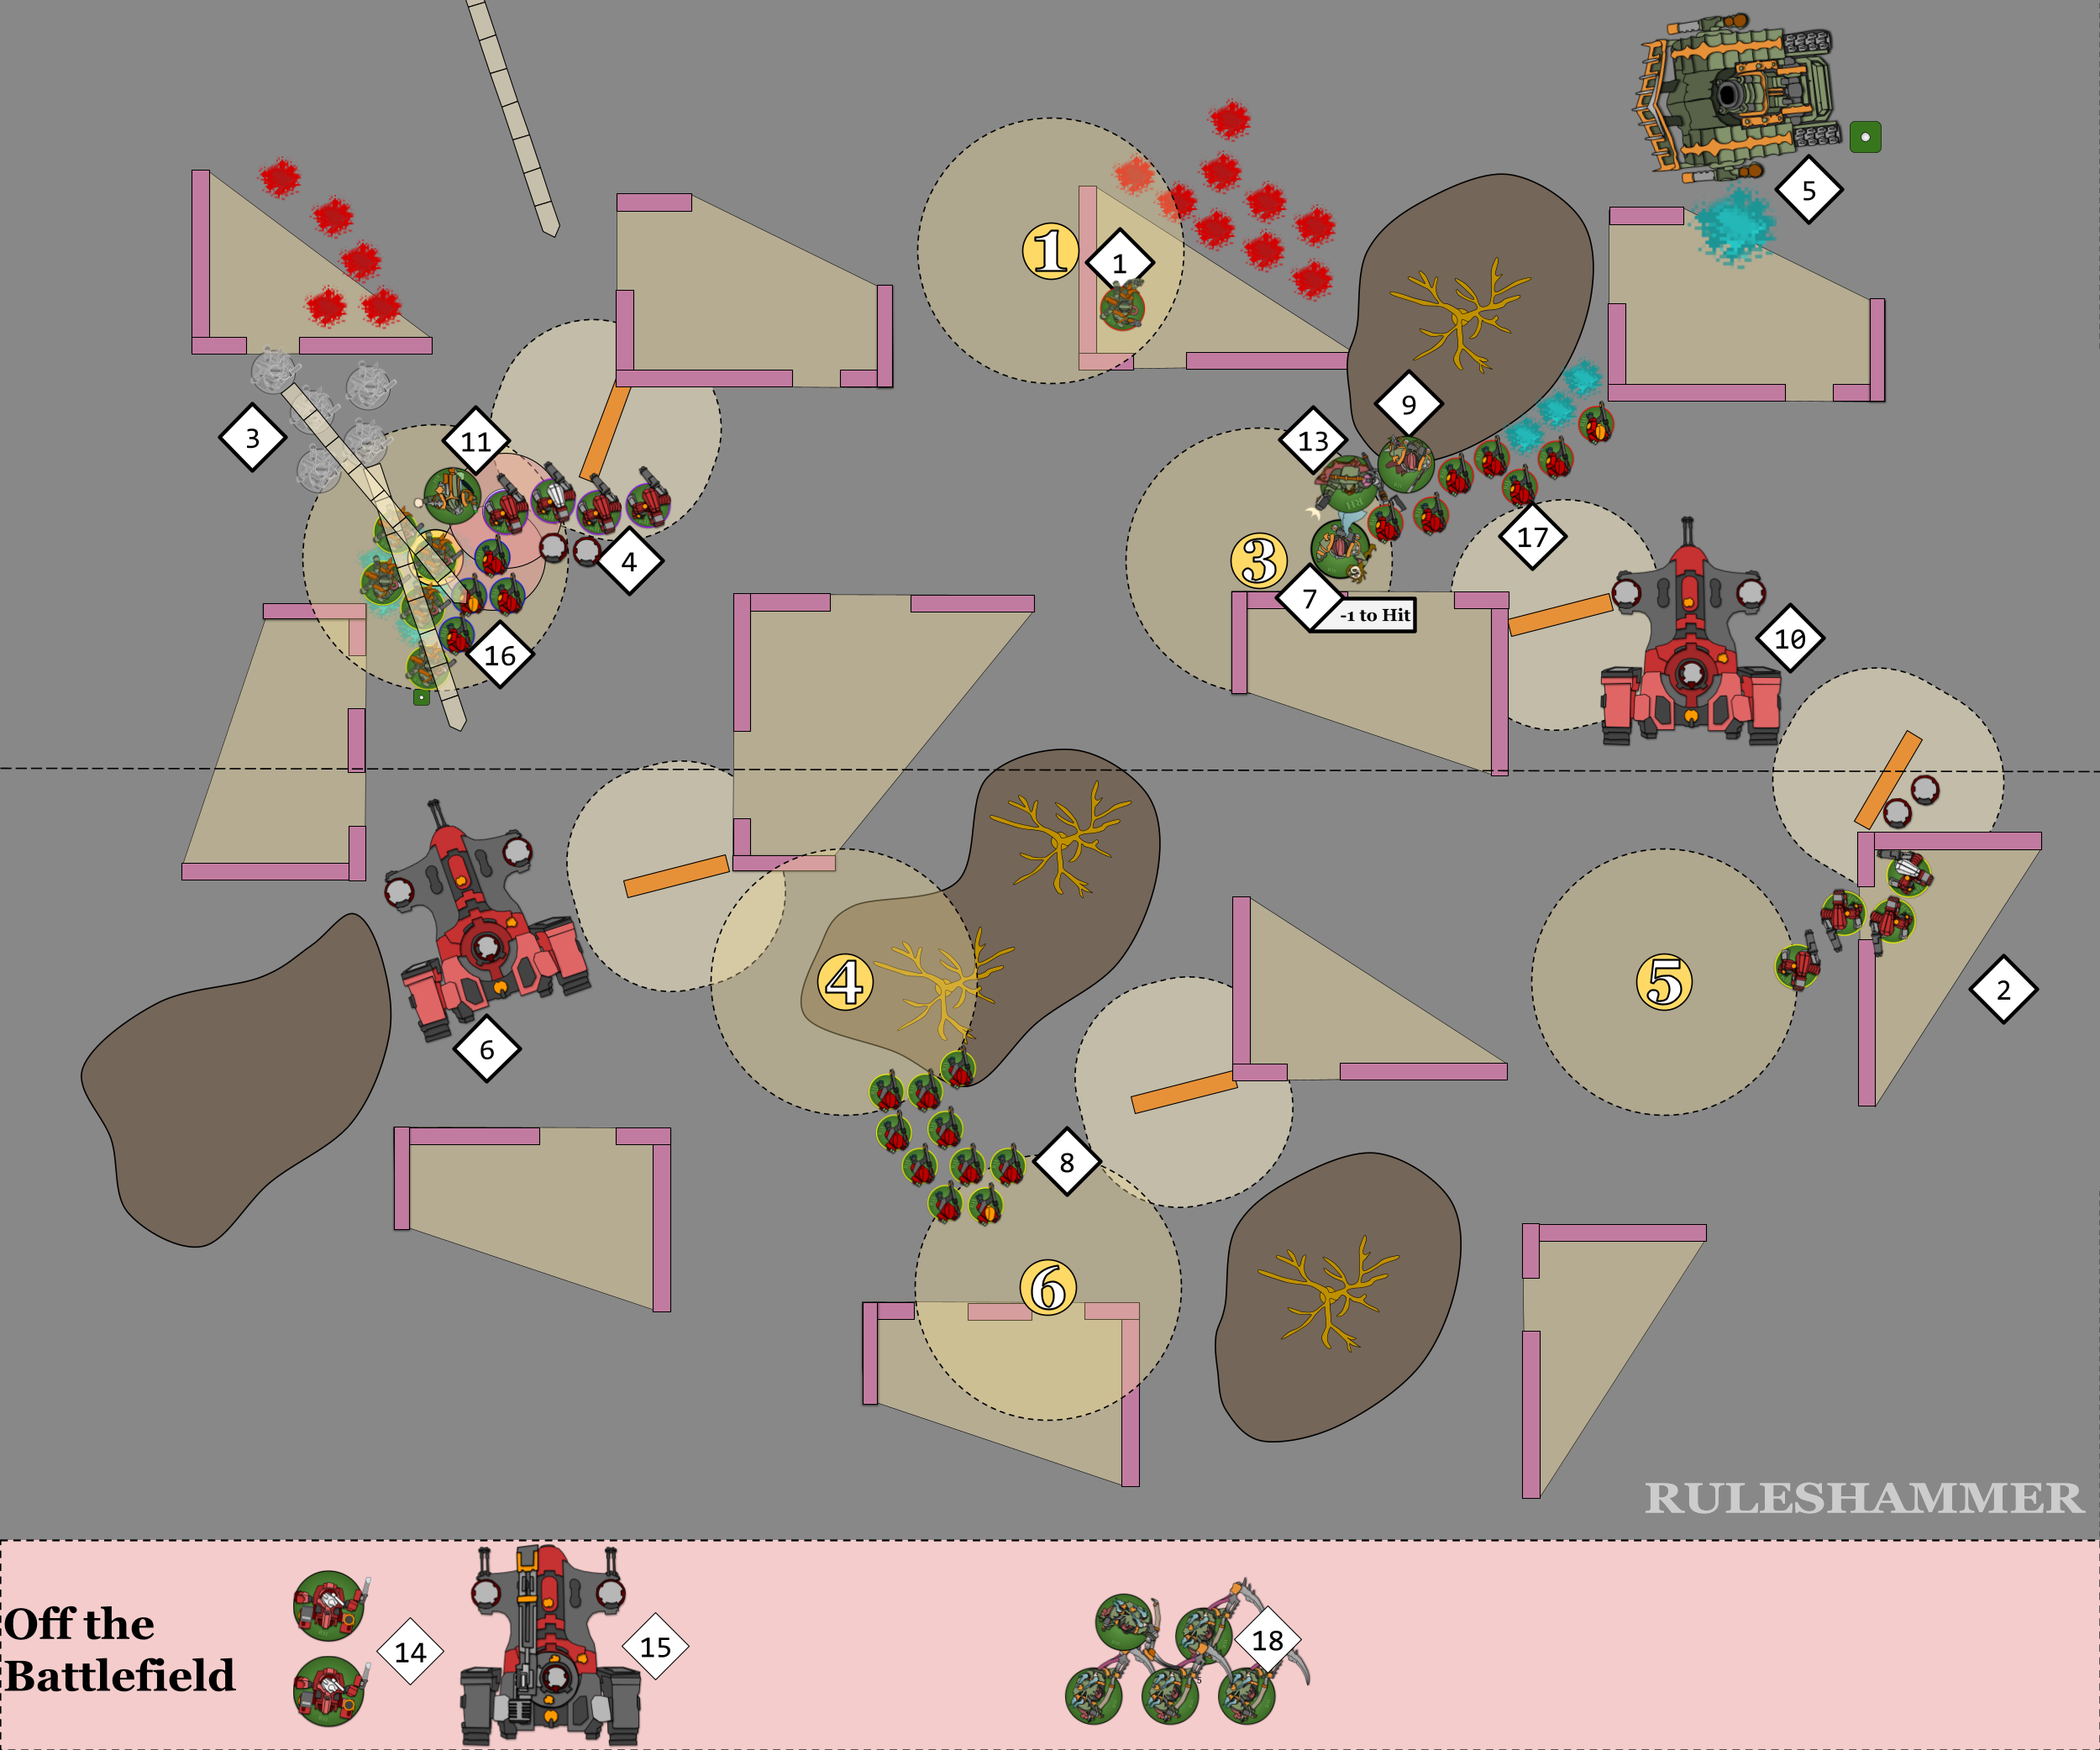
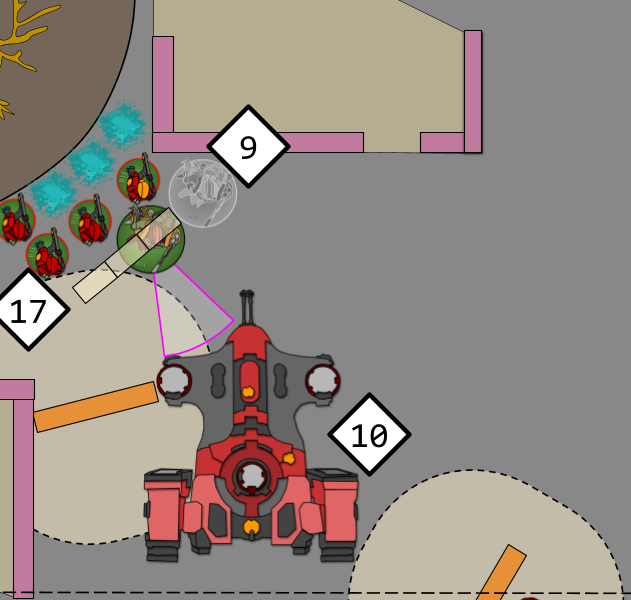
In Episode 7 the Death Guard charged a trio of Characters (7,13,and 9) into a unit of Tau Fire Warriors (17).
When it came to resolving that fight however you could argue that our Tau player was too focused attempting to maintain their objective control than realistically evaluate how likely that was to occur. These three characters had:
- 14 attacks between them,
- All of these attacks wounding on 2+ due either to their high strength or due the -1 Toughness effect of the Contagions rule,
- All of them re-roll wound rolls of 1 due to Plague Weapon rule, and
- 6 of them on WS 2+ and 8 of them on WS3+
Essentially the odds for the Tau unit living through this were low IF all three got to attack. Which is where the arguable mistake lies. Had the Tau player not been so focused on keeping that one model on the point, they could have given it up immediately and removed causalities from the left instead of the right. What would that have accomplished, though?
Well, as the Plague Surgeon (9) activated first and killed 2 fire warriors it would have forced some different decisions from the Death Guard player on which model to activate next – suddenly those units would have been outside of engagement range of the remaining Tau models.
Getting stuck behind your own models
Despite no longer being within Engagement Range of the Fire Warriors, both the Plague Caster (7) and Chaos Lord (13) can still activate to fight:
An eligible unit is one that is within Engagement Range of an enemy unit and/or made a charge move in the same turn. If neither player has any eligible units to fight with, the Fight phase ends.
Since both units charged, they’re both eligible to pile in and fight this turn. However both models have issues. Lets look at why.
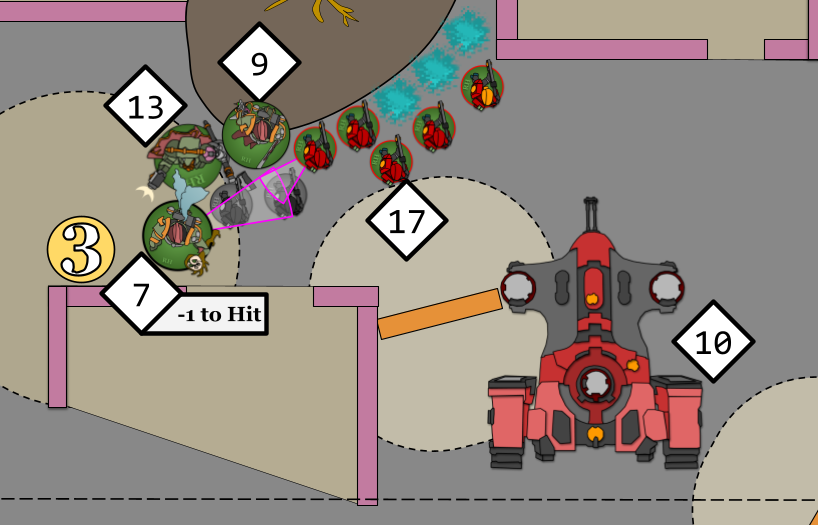
The Chaos Lord (13) can’t actually move to reach Engagement Range because it can’t fit through the gap between the Surgeon (9) and the Plague Caster (9).
The Plague Caster (9) could make a Pile In Move towards the Fire Warriors (17), however doing so doesn’t free up space for the Chaos Lord (13) and it moves the character further away from the centre of the board that they are aiming for. This detour is not massive though, so lets say they did in fact Pile In and get the same 3 kills as before. Again, the Tau player can remove models from left to right, taking the unit further away from the Chaos Lord.

In this version of events the Fire Warriors are brought down to just two. Now the unit did lose 8 models this turn so the only way they’d pass Morale is with a natural 1 or via use of the Insane Bravery Stratagem. In such a situation like this it might even be worth doing. Presuming the Tau player can either remove the characters to prevent Heroic Intervention next turn or maybe even to try and secure or remove control from Objective 1.
Using Charge Moves for Mobility
Another alternative version of events I’d like to elaborate on is how charges can be a massive amount of mobility just waiting to be used. Before the models Plague Surgeon (9) charged they were in this position:
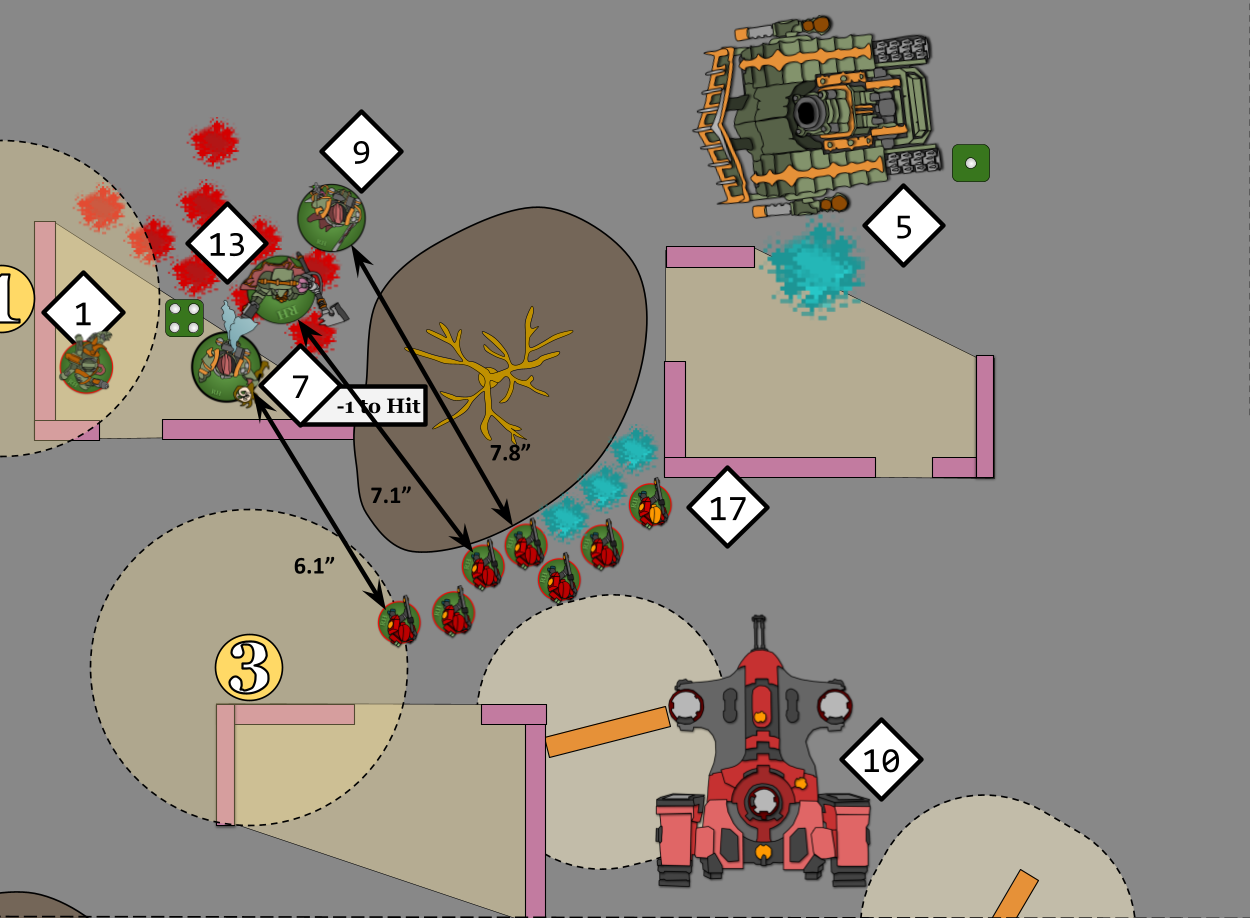
7.8″ away from the Fire Warriors, but then they rolled a 12″ charge. Rather than following their comrades with that distance they could have spread the threat around or even made use of the Infantry keyword for some clever use of fight phase movement.
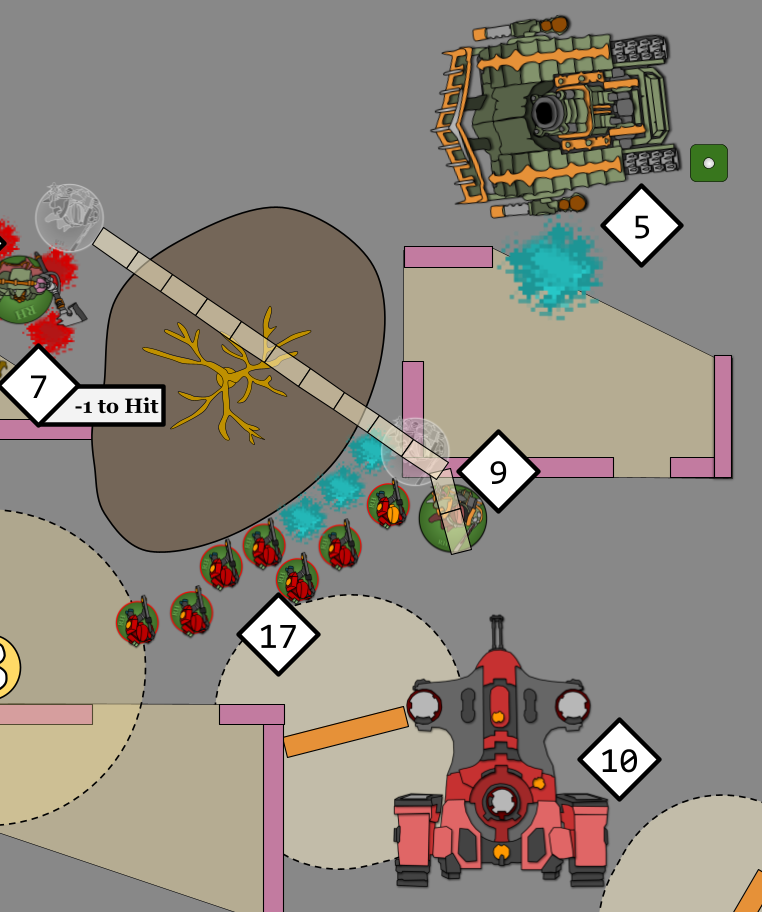
They are able to move through the wall due to the Breachable Terrain Trait.
INFANTRY, BEASTS and SWARM units can move through this the walls, girders, chains and foliage of this terrain feature without impediment.
Not only does that move avoid the scenario that could have happened above, it puts the Plague Surgeon (9) in a position to use MORE fight phase movement.
Tagging Enemy units with Pile in and Consolidation
After that sprint through a wall when activated the Plague Surgeon can now Pile In 3″ further, they specifically did not end their charge in base to base contact to allow this move as to Pile In your must end the move closer to the nearest enemy unit.
And then this time when all the Fire Warriors are killed, they can Consolidate. This must be towards the nearest enemy unit which in this instance would be the Devilfish. It would get to make some attacks back but like most tanks they would only hit on 6s. There are some pros and cons to this, obviously.
- If it does not Fall Back, the Devilfish would only be able to shoot at the Plague Surgeon. It has 16 shots, all of them hitting on 4+ and wounding on 3+ (they do differ in strength and AP but Armour of Contempt removes any difference). Saving on a 3+ with a 6+ ability to ignore wounds lost. This makes the very rough average wounds to be 16 x (3/6) x (4/6) x (2/6) x (5/6) = 1.4 wounds. Averages like this aren’t strictly accurate but it does give a rough impression that the odds are low that it would kill the Plague Surgeon alone.
- The Devilfish could fall back to allow another unit to shoot; this would mean the Devilfish can’t shoot this turn. Removing its output from the board. This would open the Surgeon up to enemy shooting from other sources but those sources were going to get to shoot at it already in the previous position it ended the turn on. Though it would have had Dense Cover.
Next Time: Tau Turn 2 Begins!
That’s all for this episode! Thanks for joining me in a review of some of the tactics and decisions made in the previous turn! These scenarios were inspired by feedback I received from episode 7, if you’ve seen something in the previous episodes that you’d like me to review like this the links to do are below as usual!
In episode 9 join me again for beginning of Tau Turn 2!
Ruleshammer Battle Index
Episode 1 – Game Set Up Part 1
Episode 2 – Game Set Up Part 2
Episode 3 – Pre-Battle Abilities, Tau Turn 1 Command, Movement, and Psychic Phases
Episode 4 – The Tau Turn 1 Shooting, Melee, and Morale Phases
Episode 5 – Tau VP and Death Guard Turn 1 Begins
Episode 6 – Death Guard Turn 1 Shooting Phase
Episode 7 – Death Guard Turn 1 Charging and Fighting
Episode 8 – Some Tactical Alternatives
Have any questions or feedback? Got a rules question you want answered? Drop us a note in the comments below, ask a question in our Ruleshammer form, or head over to r/ruleshammer to discuss.
