
The first new primarch model to be released after the Age of Darkness box, Horus Ascended goes up for pre-order today. This is a hefty model, and Games Workshop sent one over to me to paint up.
Assembly
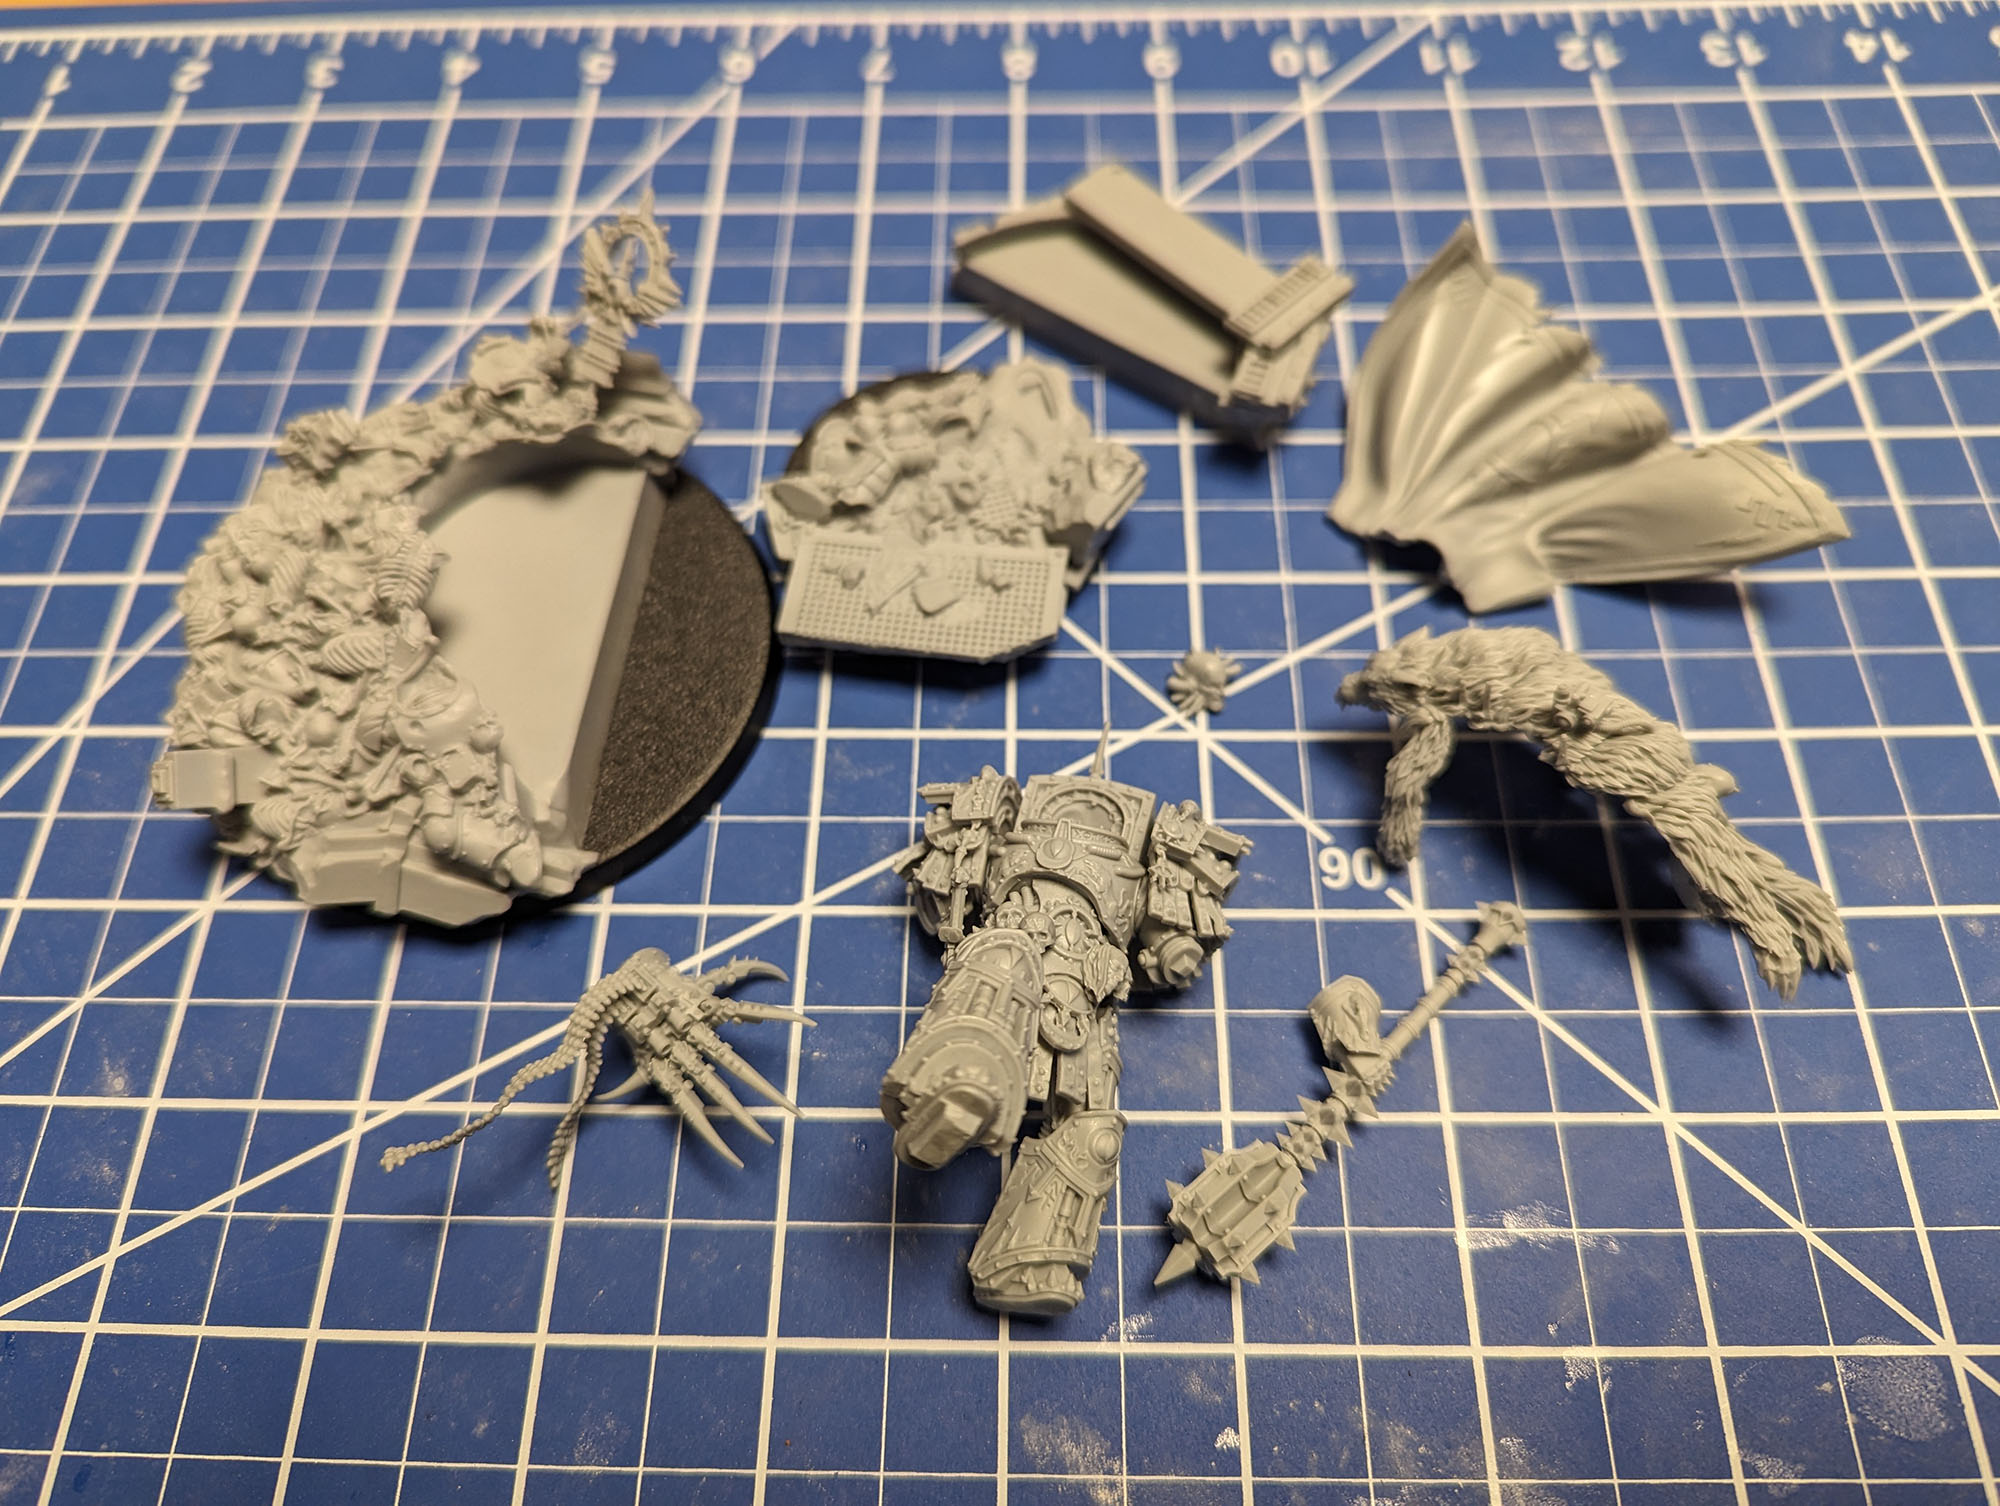
Assembly of Horus is pretty typical for any modern FW model. Cast out of resin, he’s not quite perfect, with a few minor mold lines and gates to deal with, but they’re mostly kept to hidden areas and the details are sharp. Do make sure you clean him well, even after scrubbing once there was still some mold release on the cape when I went to prime it.
I strongly, strongly suggest building Horus in sub-assemblies, and not quite following the fairly sparse build instructions. Build the talon in Step 1 as instructed (while cursing at how there are part numbers in the instructions but not on the parts so you’re guessing as to which finger is which), skip Step 2 entirely for the moment, and in Step 3 don’t attach the upper arm (part 9) to the lower arm (parts 7 and 8). Assemble as directed in steps 4 and 5, and skip step 6. At step 7, don’t glue the head (part 27) in, but do glue the upper left arm (part 9) on from earlier – it will help guide attaching the left shoulder (part 6). Glue the pteruges on in step 8, then go back to step 2. Using the now assembled body as a guide, get the wolf pelt assembled, keeping in mind alignment with the two attachment points on the shoulders. Don’t glue the pelt to the body at this stage, but I found it almost impossible to attach piece 34 in the correct location without using the body as a guide.
At this point you should have six different pieces – left arm, right arm, head, body, cape, and pelt. This is how I kept it to paint. It does mean some wasted effort on detail that’s ultimately covered up by the cape or pelt, but gave me a lot more access to the model while painting – and there’s a lot of random detail you’ll want to get your brush to.
When you do get to final assembly after painting, put the cape on first – some of its folds help determine exactly where the mace sits, and if you glue the mace on first getting the cape in can be quite difficult.
Painting
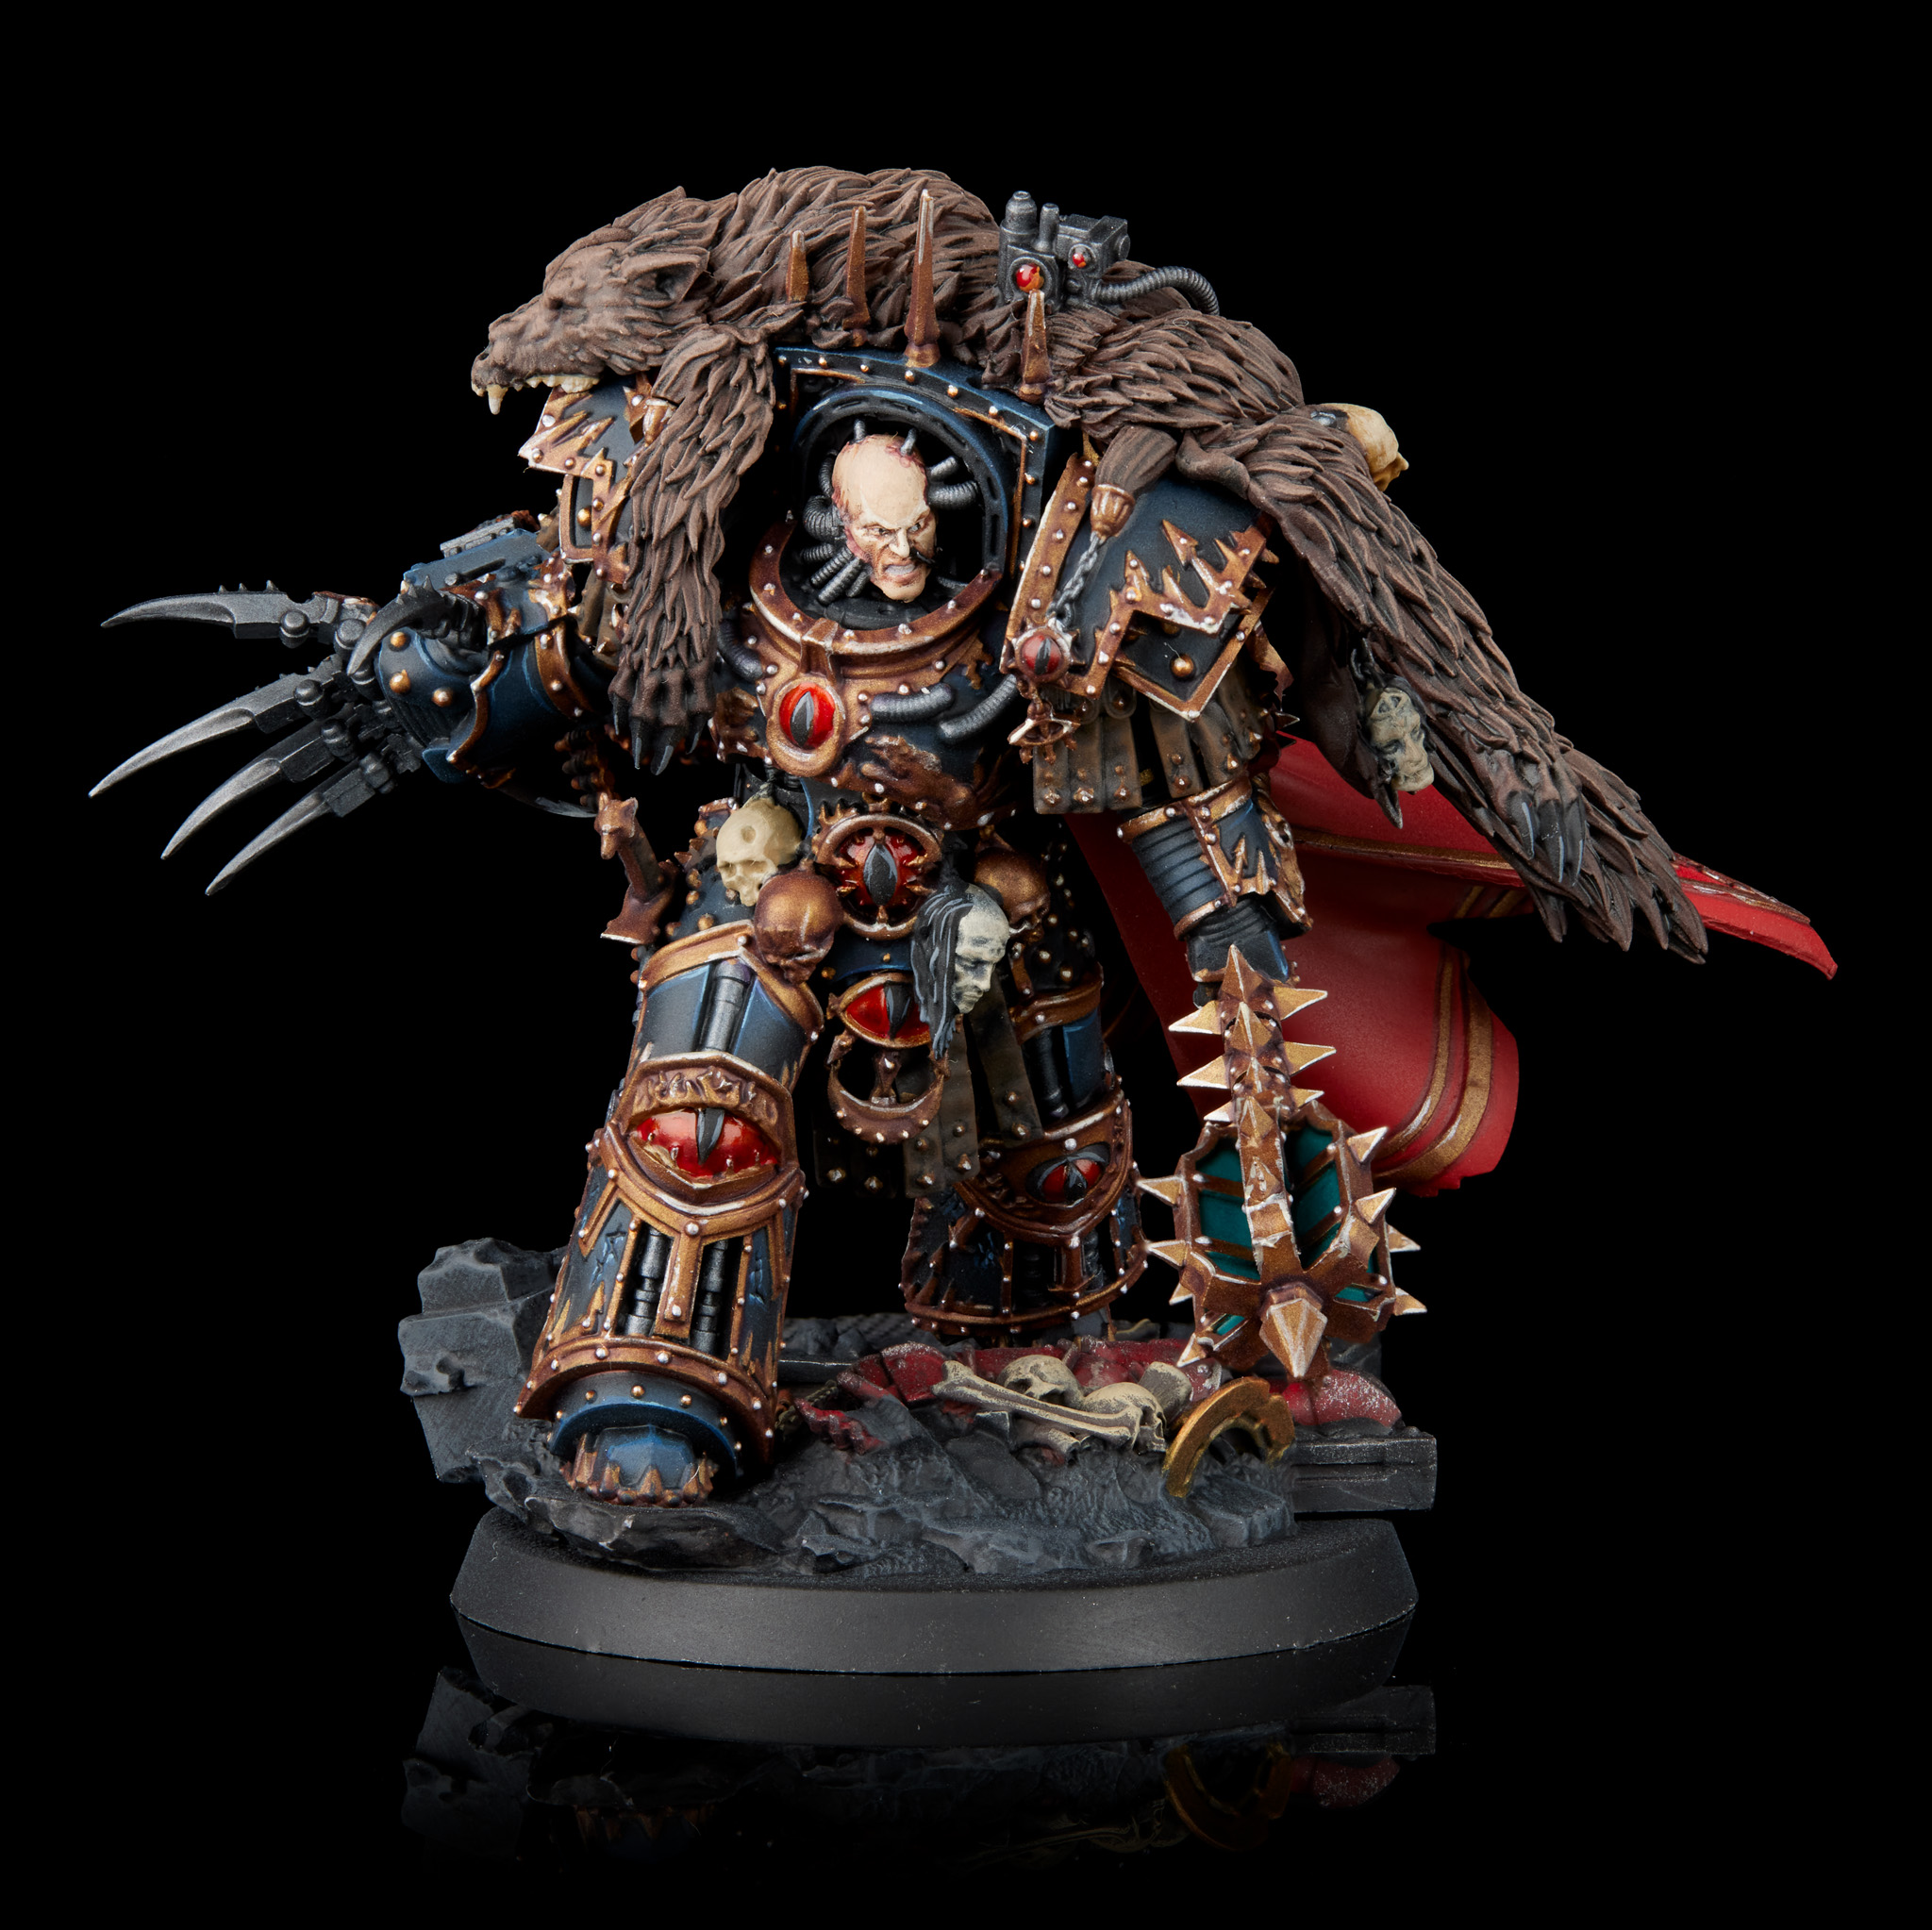
I used Horus as a test for some of the ProAcryl range, and ended up quite liking them. The black armor started with Coal Black, and I then airbrushed Dark Grey Blue from above. After washing with Nuln Oil, I did edge highlights on the armor in Dark Grey Blue and Grey Blue.
The cape started with Vallejo Surface Primer German Red Brown, after which I basecoated in ProAcryl Burnt Red. I mixed some Mahogany into the red to build up the shadows, and used Boly Pyrrole Red for the highlights. I then went in sparingly with Agrax Earthshade to define some holes and folds.
The pelt was Mahogany, then a bit of a highlight with Light Umber, an Agrax Earthshade wash, and a drybrush of Light Umber again. I picked out claws in black with a medium grey highlight, and teeth with Zandri Dust and Scale75 White Sands.
Gold areas were Scale75 Viking Gold, a Druchii Violet wash, and highlights with Scale75 Dwarven Gold and Citrine Alchemy. This was, by far, the single longest step. There is a lot of trim on this guy.
Once I had all the main areas blocked in I was able to go through and finish off all the random details in leather, silver, or brass.
The base was the last part, and by far my least favorite. I think the Horus model itself is let down by the display base, which is an overly busy mess without a clear theme beyond “skellingtons”. I’d like to have seen a simpler base that ties back to Mike McVey’s classic (turns 30 this year!) diorama of Horus fighting the Emperor.
Overall, I’d give this kit about a 9/10 for Horus himself (he loses a bit for the complexity of assembling the pelt) and a 5/10 for the base. Fortunately he’d be very easy to put onto any other 50mm base that matches your army.
